Thursday, March 31, 2011

Bringing the outside into the office...

Here is a little project I did
because I wanted to bring a plant into my office,
and I didn't just want to put it in a cookie cutter pot:

Boy! Does that look bright!

This was a very quick project, and it cost just $2.29.


It is a classic Terra cotta pot & base
but I wanted to keep busy and make it unique,
so I decided to paint it.

The color in the photo is much more purple than it really is.
Its more of a blue.

It's so bright, I'm a little fearful of what it will look like at my desk.

This was a quick and easy project that was a nice way
to keep busy. I'm envisioning a multitude of colorful
shiny pots in a row, or maybe on different shelves, hmmm...

I hope you get the chance to be creative today!

...from Lori @ Kitchenfunk


Tuesday, March 29, 2011

It's Official, I'm Amazing

My kids have declared that I am amazing!
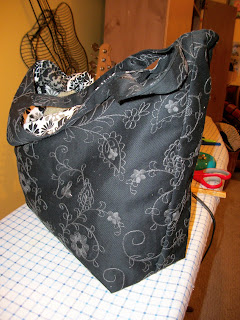
All because of this bag.

Yes, it is my second bag, and I made it tonight!

I used the same tutorial I used in my post Sunday, from:


Because I wasn't making it reversible, I was able to do the top stitching around the edge. I love this look! Like I'm skilled!!

You can see it here, too. And you can get a good look at the 2 fabrics I chose:
I also made the bag a little bigger this time.


And you can see, above, that I made the corners wider as well,
to give the bag a roomier feel. Love this!

And I used 1/2 yard of each fabric. Both were $4/yard on clearance, so the total cost was only $4 for the entire project. Here is a good look at the inside. I love this fabric.
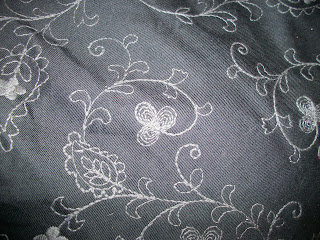
And here is a detail of the outside. I wanted a serious look for this bag,
a little professional but still fun.

This weekend I hope to get some time to sew a bag with pockets. Wish me luck!

(And though my kids are vying for the chance to use my new bag tomorrow,
I'm pretty confident I will be the one using it!)

I hope you get the chance to be creative today!

...from Lori @Kitchenfunk


Running with Glitter

Monday, March 28, 2011

"I Spy" Toy

This is a very simple tutorial
to make a fun toy for elementary school aged children...

Let me apologize in advance for the poor photo quality!

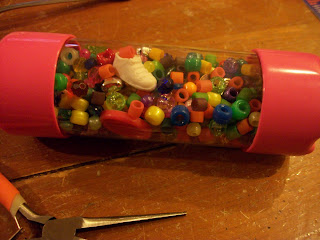
Start with a "View-tainer" - I bought mine at K-mart for less than $3


These containers are made to bounce when they fall, without
losing any of the items inside. However, I didn't want to
take the chance that a small piece would fall out of it.
Even if a child is older, there is always the chance
that a smaller child will pick up any pieces that
might fall out of it.

So I bought duct tape and this adhesive:

I don't know why I didn't take any pictures of this next part, but here is what I did...

I first took one end-cap off of the Viewtainer, and covered it with 2 crisscrossed pieces of duct tape. Then I spread the glue around the cylinder, and affixed the lid.


I then filled it with beads, and found objects that were small enough to mix in, but not too small. Most of the beads I used were similar in shape, but I made sure to throw in a heart and a star bead in, and some other shapes.


Next I duct taped and glued the top on, just as I had done with the other end.

Ta-Da!


This is a fun game to take in the car.

I hope you get the chance to be creative today!

...from Lori @ Kitchenfunk

Running with GlitterSumo Sweet Stuff

Sunday, March 27, 2011

My First Reversible Bag!

First of all, I cannot believe I made this.

Second, I can't believe how easy it was!


I followed a great tutorial here, on this site:


Cindy, the host of Skip-to-my-Lou, showcases all sorts of things to make life fun - from recipes to party ideas, to sewing patterns and more!

* * * *

I found these two coordinating fabrics on the clearance rack
at Jo-Anne Fabrics. How great is that?

Then, since I knew I wanted to make a reversible bag,
I decided to add another factor - adding the fabric to both sides.
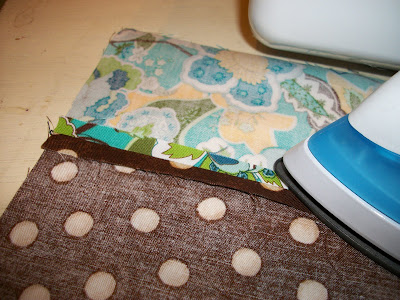
So I cut a small strip off of both colors and stitched them together.

I ironed the pieces flat...


Then I proceeded to follow the tutorial directions.


I have to recommend that if you sew, or if you think you might
want to sew, you should really check out Cindy's site!

Happy Crafting!

I hope you get the chance to be creative today!

...from Lori at Kitchenfunk


untitledSumo Sweet Stuff


Tuesday, March 22, 2011

Friend Check up - Pay It Forward!

I don't know if anyone is reading my blog this week, and honestly it is a huge thing for me to keep up with my blog reading, my normal business, and crafting.

But apparently, this game has been going
around the blog world.
I haven't seen it until now, but I love the concept!


The "it" can be as small as a book mark!

Pincushion sent by bissel-kids

I spotted the game on Quilter in the Gap, a blog hosted by Rhonda. She is a super quilter and you can see her passion on her website.

Here are the details of the game:
  1. I will make a little something for the first 3 people who comment on this post. It will be a surprise and it will arrive when you least expect it.
  2. I will have 365 days to do it in. What's the catch? To get a handmade present from me, you have to play too! This means YOU pledge to send a little handmade something for 3 readers of your blog. It doesn't have to be quilty - just handmade.
  3. You must have a blog.
  4. Once you comment here, you must post about your Pay It Forward on your blog to keep the fun going - with the Pay It Forward badge. Also, feel free to join the Flickr group to see what else is being sent!
I saw the Pay-It -Forward post on her site last night. I hesitated to join in because Rhonda and I, who have not met, were recently swap partners who exchanged fabric scraps. But tonight after work I went straight to her site, and I guess Tuesday is a hard day to keep up with blogs, because I was able to join in!

If you are reading this, I hope you'll consider joining in. What's so fun is that there is no set date. You get to surprise someone when they least expect it.

I'm going to take some hand sewing projects and pick up my daughter from an event. I wonder how long I'll get to wait in the car so I can work on my project??

I hope you get the chance to be creative today!

...from Lori @ Kitchfunk

Monday, March 21, 2011

Garden Planning for 2011


I have been musing over my garden for the 2011 summer season. I had been considering moving it from one side of my yard to another, and now I'm not sure I should for several reasons. I won't go into that now... because I am even more interested in deciding what I should plant this year!
I know I don't need four cucumber plants. That was just WAY too many. Even giving them away I made jars and jars of pickles and there are too many for us to eat...
I also know that we loved the peppers,
even though we had TWELVE pepper plants!
Six were Sweet Banana Peppers and six were Bell Peppers.
We made the most delicious salsa with our tomatoes and peppers,
and we are still enjoying it today! We bought a few extra hotties from the farmer's market to add the HOT STUFF to the salsa, because ours was too mild.
But it ended up sooooo good.

And fresh peppers roasted in the oven... mmmm.

I am off to sketch out this year's garden.

Last year we joined Triscuit's Home Farming plan. I'm doing the same thing this year. It was a fun way to be a part of a gardening community, since I live out in the burbs and not everyone gardens.
Yes, I said Triscruit. The crispy wafer! :-) Boy that word looks like I spelled it wrong.
Anyway, I'm off to sketch out my garden!!

I hope you get the chance to be creative today!


...from Lori at Kitchenfunk


untitled

Sunday, March 20, 2011

Wine Bottle Decorations

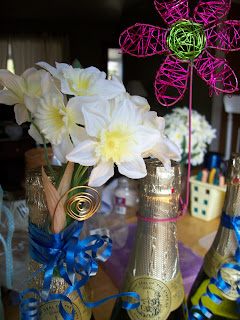
One of the things I was busy with this week was creating wire decorations for some non-alcoholic cider bottles to be used as door prizes for a youth group dinner.


The kids are raising money for a missions trip,
and my daughter and I volunteered to make these.


It didn't take that long and it was fun to work together to make them.

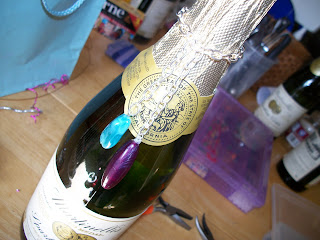
The beads on this one were from an old necklace we actually took apart.

You might recognize this flower (above) from this tutorial...

This is one wire shape we did NOT make. We bought it for $1 at the grocery store and thought it looked cute just the way it is. This was a fun, simple project that didn't really cost much, because the non-alcoholic cider bottles were $2.00 each at Costco.

I hope you get the chance to be creative today!


Running with Glitter